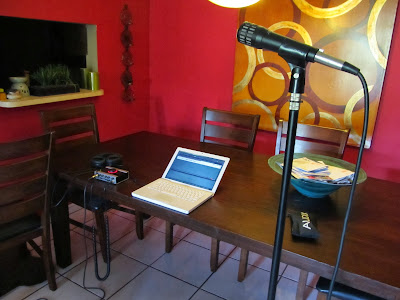
Hi guys and girls, this is Kevin from HotBot Productions out in sunny Miami, FL. I've decided to help you guys learn how to record vocals as part of the Coursera.org Intro to Music Production course. Let's get started!
First off, here's a list of things you'll need to lay down some fat rhymes or sweet poetry:
- singer/poet/talent
- Microphone (with clip)
- XLR cable
- Audio Interface
- USB cable
- Computer with DAW software
- Headphones
Most vocals are recorded using condensor mics because of their ability to pick up very nuanced transients. The human voice is a sonically rich instrument, so you want to use something that will get as clear a sound as possible. That said, we'll be using a dynamic mic for this demonstration as it's the only mic I have. :)
Before setting up your session make sure your interface is configured with your DAW. Nothing takes the wind out of the Creativity Ship like having to sift through manuals and dialogue boxes. This would also be a good time to verify that your inputs, outputs, sample rate, bit depth, audio file type, and buffer size are set up the way you want them to be. Ready? Let's do this.
Make sure the input knob on your interface is turned all the way down before moving on. This is to save your speakers, ears, and gear from the noisy clicks and pops you get when you plug and un-plug the various cables in your signal chain.
I find that setting up the mic stand where you want it to be, before plugging in the mic, is a lot safer than setting up the mic and then trying to move it around your room.
Once your mic stand is set up, attach your mic clip (these usually come with your mic) and then the microphone.
Plug the female end of your XLR cable into the end of the microphone. Remember that the microphone is sending the signal out into the cable so the end is always male.
Now plug the opposite end into your audio interface. The interface should already be plugged in to your computer via USB or Firewire.
If you're using a condenser mic you can turn on your phantom power now.
Assuming your DAW is already running, set up a new mono audio track. - Quick Tip - in Ableton you can hit Command+T on Mac (Ctrl+T on PC) to quickly add audio tracks.
Now for the fun part... the sound check. Record enable your audio track and have your talent perform the loudest section of their piece. You're looking for a nice solid level free of distortion. About 3/4 of the way up is generally a good place to keep your peaks, but use your ears before making any final calls.
Be careful as this is the point where you can get feedback if your not monitoring on headphones. Turn up your headphones slowly to a level that's comfortable for you and your talent. Depending on your hardware you can configure your outputs to work as separate monitor groups. But that's a lesson for another time.
Typically when you're doing a sound check the talent will be quieter than they will be during the actual performance. Something about getting caught up in the moment. Go figure. This is why you should err on the side of caution and turn your input down some even if you're not clipping. Weak signals can be boosted later in the mix but distortion lasts forever.
If you're happy with your levels then you're ready to record! Record enable your DAW and hit play. Now go out there and make some beautiful music.
Thanks for taking the time to read through my tutorial. I hope this helps some of my fellow class mates. I'm looking forward to hearing your feedback. Don't forget to tear down after you've finished and have fun. Cheers!


No comments:
Post a Comment